Operation Buzzkill, Part 4: Peak Road grips by Spider Grips
At the beginning of this series, I said I’d be working through potential remedies for my 2013 F 800 GT’s annoying vibration at the bars, going from least expensive to most expensive, so ending with new grips may seem terribly out of order. After all, a set of aftermarket grips can be had for $12, and I’ve already covered mods costing ten times that sum. Must I remind you my bike is a BMW? Things were not so simple!
 Had my BMW not been equipped with factory heated grips, things would have been worlds easier and cheaper. I could have replaced my thin, hard, worn OEM parts with fresh, superior alternatives from any number of other manufacturers and paid less than 20 bucks for extremely nice, soft, thick grips made of tacky rubber compounds. Such grips would have been more comfortable and damped more of the vibration at the bar-hand interface than the stockers. If you have non-heated grips, you can skip the account of my heater-related trials and tribulations to find out how much difference the replacement grips evaluated here made.
Operation Buzzkill, Part 1: Grip Puppies
On the other hand, if you have factory heated grips, read on to see what’s involved in what should be a super-simple rudimentary modification, then make an informed decision after seeing how I dealt with the emergent complications. It’s fitting to end Operation Buzz-Kill with this intervention because, while it wasn’t the most expensive in terms of money, it was by far the most costly in terms of time, effort and frustration. Armed with the information below, you needn’t re-experience my torment, but even with all the hassles I consider this project to have been worthwhile.
OEM Heated Grip Separation (and Repair)
There are a variety of ways grips can be heated, and BMW has used two different setups: either a coil of extremely thin wire wrapped around a plastic tube with the grip molded over it, or a plastic sheet containing a flat element winding back and forth within it; this sheet is wrapped around the handlebar/throttle tube and the grip attaches at its inboard and outboard ends. The wire or flat element essentially serves as a long resistor and generates heat when current passes through it. BMW sells these as prefabricated units and they are not meant to be disassembled. Of course, without disassembly, the grips cannot be replaced without forfeiting the heating elements.
Having installed many aftermarket grip heaters (separate from grips) and heated grips (with integrated heating elements) and feeling emboldened by internet forum accounts of people successfully completing the required surgery on their Beemers, I was determined to put new grips on my bike while preserving their heating functionality without paying the $325 BMW would charge me for a new pair. Grip replacement has been the first modification I’ve made to every motorcycle I’ve owned over the last 30 years. I’m picky about my grips, and OEM versions are never anywhere near as good as premium offerings from the aftermarket. Even if my BMW didn’t suffer from excess vibration, I’d have considered upgrading its handgrips a high priority, and something anyone should be able to accomplish without spending hundreds of dollars.
 WARNING: If you proceed with dissecting your heated grips, know this might result in irreparable damage, even if you’re careful. However, as I will show, there are fixes costing a small fraction of what you’d spend to replace the factory parts.
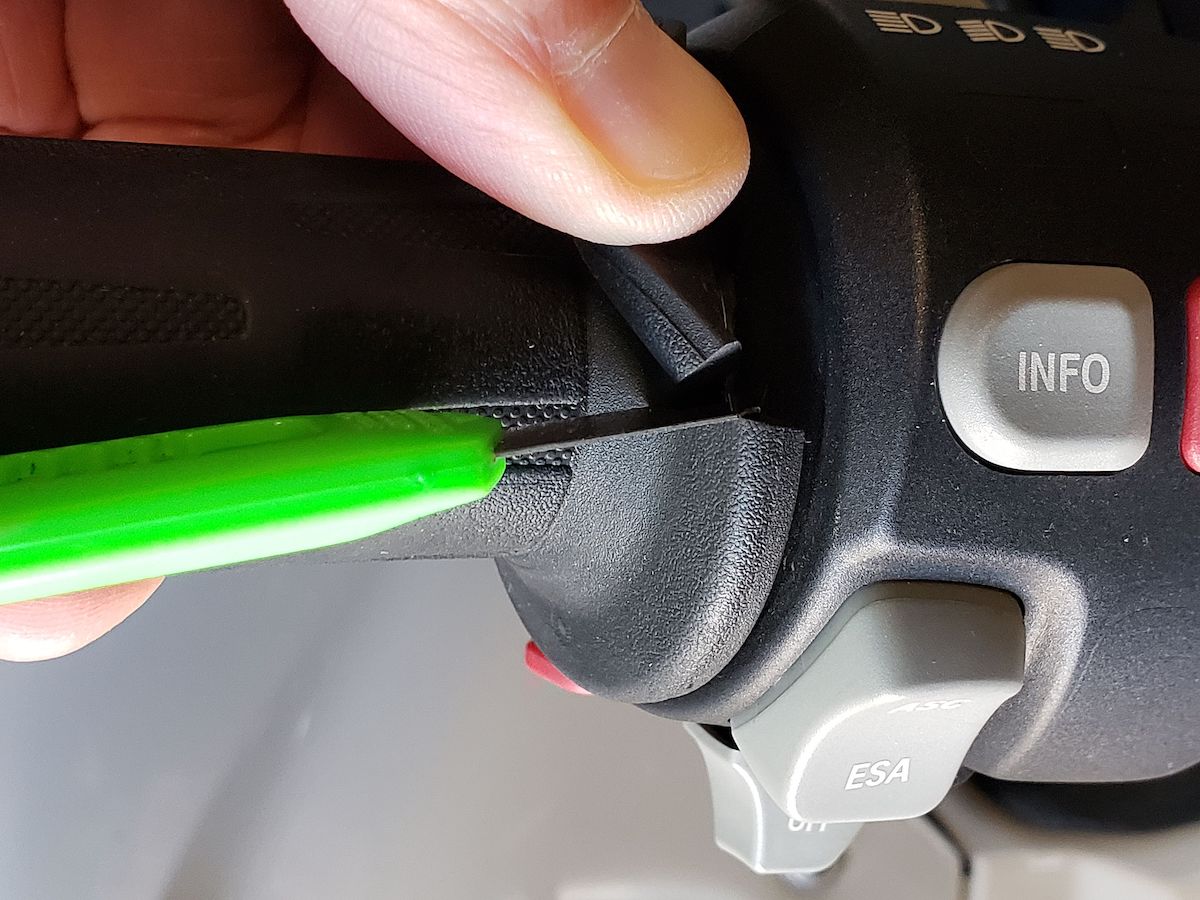
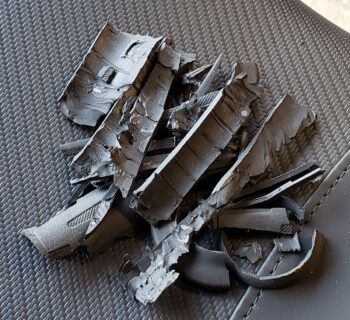
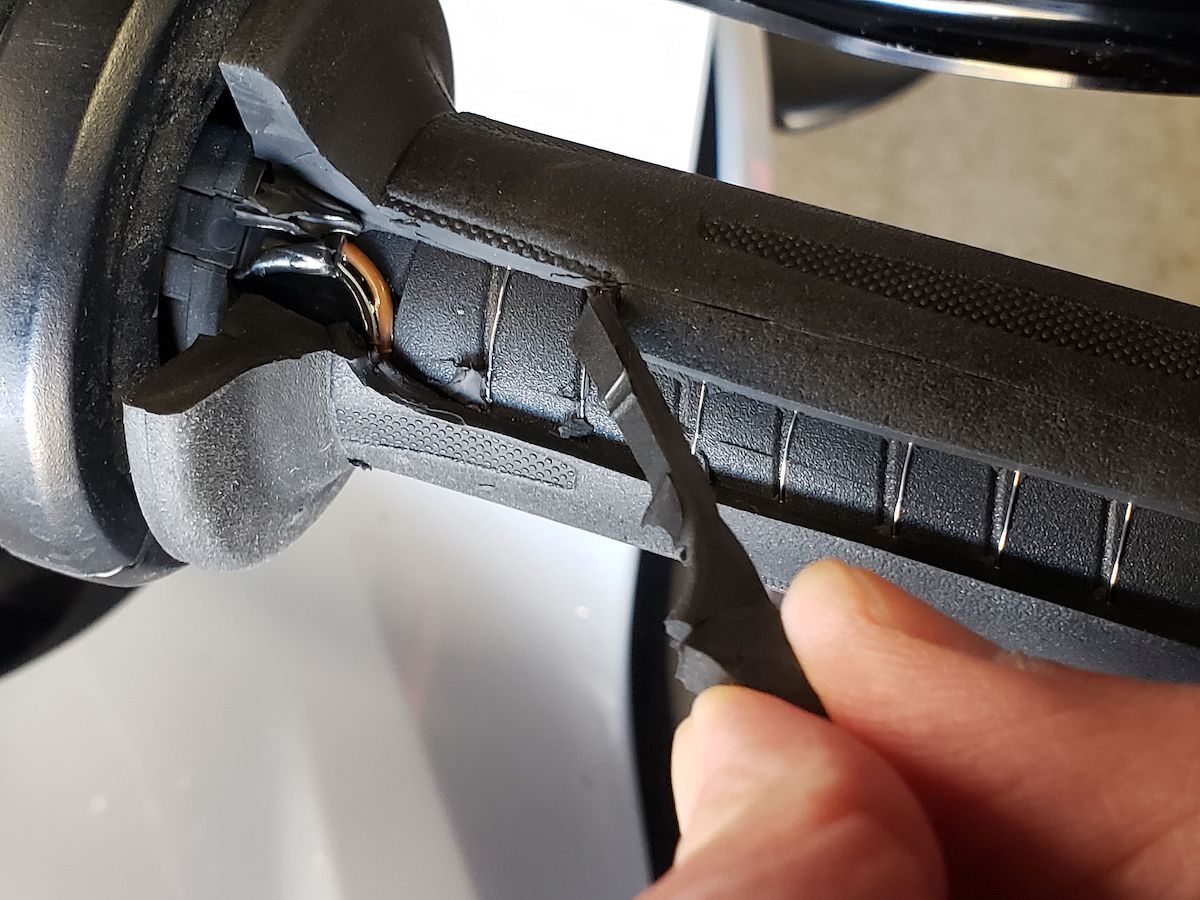
My GT turned out to have coiled wire elements, which are the more difficult of the two types noted above. If your bike has the sheet-style heaters, much of what follows here will still apply, you’ll just have a much easier time because your grips are only attached at the ends. After getting bar-ends or handguards out of the way, the first step in replacing grips is obviously removing the old ones. You can’t just slide or peel them off, like unheated versions. Removing the left side on my bike was much more difficult than the right because the left grip adhered tenaciously everywhere, whereas the right grip could be more cleanly separated across most of the throttle tube. On the left, the rubber had to be carefully cut from the inner plastic tube in whatever sized chunks I could manage. It was like carving incredibly tough meat away from a bone; I would grab a piece and pull it while slicing as close to the plastic as possible until the rubber would eventually tear off and I’d have to start over on another small section. It helped to first cut the grip lengthwise into 1/2 to 3/4-inch-wide strips, and then remove each strip in two to four chunks—this was every bit as tedious as it sounds. Use a small, sharp blade and play relaxing music.
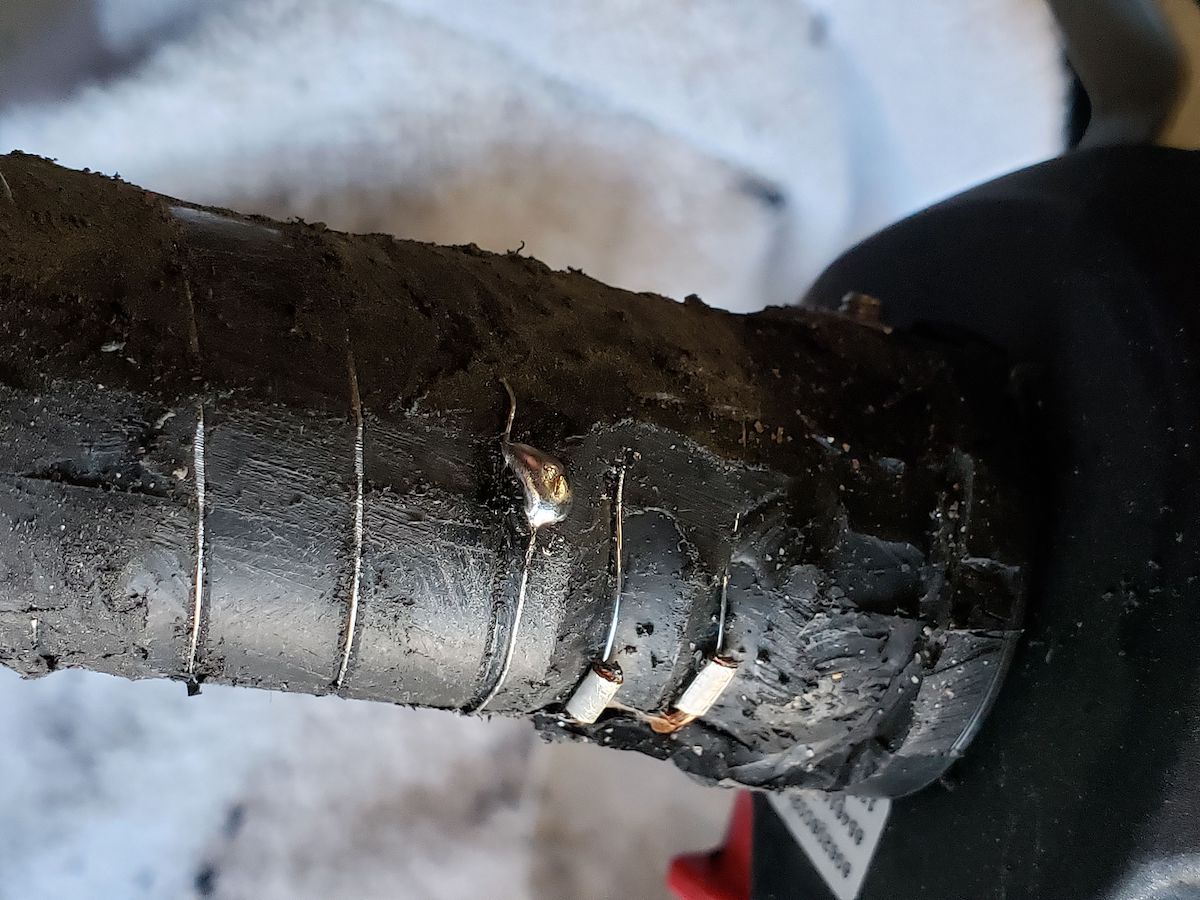
When making the initial slices, it was critically important to use shallow, gentle, patient cuts, going a little deeper each time until I felt the blade bump against the wire coils. Sawing more vigorously could nick or sever the wire, as I learned the hard way. Fortunately, it was not difficult to solder the resulting gap back together and restore my left element’s functionality (quickly confirmed without the insulating rubber to delay heat detection). Cutting at the inboard edge of the grip requires extra car because delicate wire leads reside beneath the grip’s large flange; these connect the heating element to the bike’s electrical system. The leads can be revealed by beginning the grip separation process near the switchgear and pulling the rubber back from there. Cutting a wedge out of the flange first, with a short cut further into the grip’s length, will make starting this easier. My bike’s left grip also had a screw near the inboard edge that locked it in place on the bar. Removing this screw allowed me to rotate the plastic tube for easier access to lower sections of the grip.
Operation Buzzkill, Part 2: HVMP bar-ends
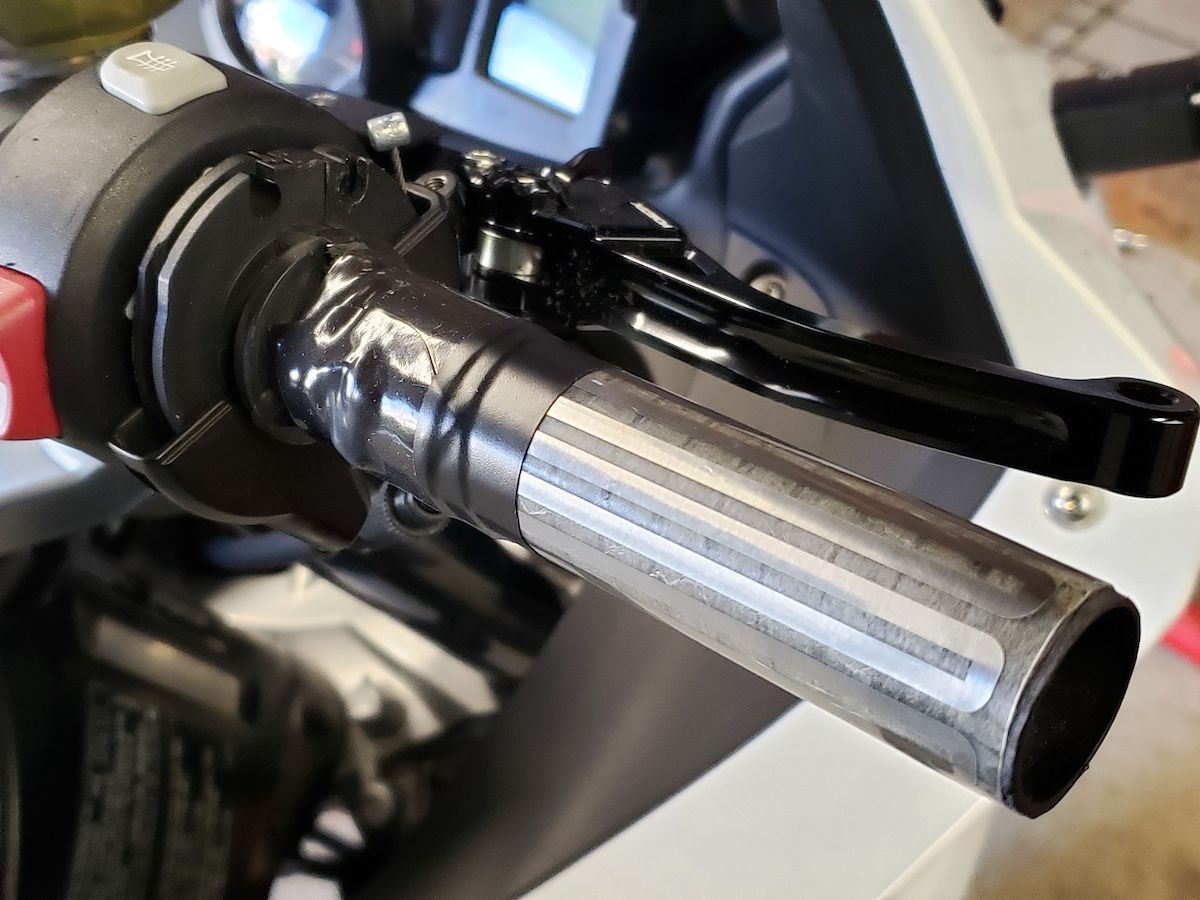
With the left grip mostly shaved off, I used coarse sandpaper to smooth the remaining rubber. It wasn’t pretty, but it didn’t have to be; all would be concealed beneath the new grip. Also, because the rubber still clinging to the plastic tube held the coiled wire in place, I didn’t have to worry about the new grip pulling/ripping the gossamer element on its way on. I actually regretting doing such a “good job” of removing the rubber in some areas and ended up wrapping them with self-fusing silicone tape to protect the element during grip installation. I used a Dremel tool with a sanding wheel attachment to grind down the old grip’s outboard flange, then wiped everything clean with rubbing alcohol. I coated the inside of the new grip with alcohol, too, and while everything was wet and slippery, I forced the new grip on. It was a very tight fit, and I could have made the process easier by injecting compressed air in between the grip and the tube, but I didn’t want to risk damaging the fragile heating element with the air gun nozzle.
Anyone who replaces grips on a regular basis has a pet method. Without inserting a mini-article on technique here, I’ll just say I’ve found alcohol – especially when accompanied by compressed air injection – both efficient and adequate. Grip glue can quickly become an awful mess, and hairspray can dry too fast, not to mention having to manage overspray. Either of these popular methods can also be problematic on top of heating elements, depending on how their ingredients respond to “cooking.” Alcohol is slippery, and if it dries early, it’s easy to just add more. Once in place with the alcohol gone, the grip’s bare rubber interior is surprisingly, er, grippy. As long as the grip is tight on its perch, I’ve found an adhesive is seldom necessary. On those rare occasions when I have eventually gotten some grip movement, squirting a little hairspray in under the rubber (using a straw from a can of aerosol contact cleaner) has always done the trick.
Upon reproducing my removal efforts on the right side, I was delighted to find this grip – once separated at its ends – could be peeled off in full strips instead of small chunks. (Detaching the throttle cable allowed me to rotate the grip and more easily access its underbelly.) The rubber seemed to have been glued instead of fused to most of the plastic throttle tube, and the strips came off largely intact, leaving the heating element completely exposed. In my excitement about this accelerated progress, I got overzealous in slicing the grip into strips, and wound up severing the element in several places before I knew it, greatly complicating the task of soldering. In addition to these obvious mistakes, I had nicked the wire elsewhere; handling it unsecured to the plastic tube caused additional breaks at those weakened spots. After numerous attempts, I finally despaired of repairing the element; I wouldn’t have trusted it, even if I’d gotten it to work. So much for accelerated progress.
I found a used OEM replacement on eBay for $50, initially planning to redo my work with more finesse. Then I realized there was probably nothing special about the wire element – why not just replace it with a standard-issue aftermarket grip heater? Generic sheet-style versions are readily available for $20 a pair, and I found accounts online of people doing exactly this with success when their BMW heating elements had failed. Note: Sophisticated electronics on some motorcycles may detect and reject this substitution, but mine did not. Such rejection might be avoidable by ensuring the impedance of the replacement heating element matches that of the OEM part.
The aftermarket grip heater’s wires were easily detached and replaced with the existing leads. With the old wire element discarded, the new heater simply wrapped around the bare plastic tube and stayed put with self-adhesive backing. (Again, functionality of the naked element was easily tested.) This created a much better surface for sliding on the new grip; I’d have had to wrap the entire wire element in tape to hold it in place during grip installation. On the aftermarket element, I only taped over my inelegant solder points where the leads attached. While these metal blobs were hideously bulky, they were rendered virtually invisible and irrelevant on a tactile basis once the grip was installed over them. Another alcohol rubdown and the new grip slid into place with relative ease. Although the difference is subtle, the new heater seems to generate slightly more warmth than the OEM; I will probably replace the old left element with the remaining aftermarket heater when I need a small project on a rainy day. If I were to do this all over again, I’d be much more aggressive in removing the left grip, unconcerned about the flimsy wire element I’d be replacing; I’d need to get all the way down to the bare plastic tube, anyway, to give the sheet-style heater’s self-adhesive backing good purchase.
Note: Aftermarket grip heaters are not all the same. The simpler ones, like what I used, have a single element, with heat adjustment accomplished by sending more or less current through them or interrupting current at different intervals. The more complex versions use two elements, with heat regulated by activating one or both. Single-element heaters are cheaper and allow straightforward replacement, whereas dual-element heaters require connecting both elements to the leads in parallel.
While I cannot confirm this from personal experience, forum posts suggest bikes with the sheet-style OEM heaters only require cutting the grips at their edges. They can then be peeled off without cutting them into strips, which avoids the risk of slicing into the flat elements.
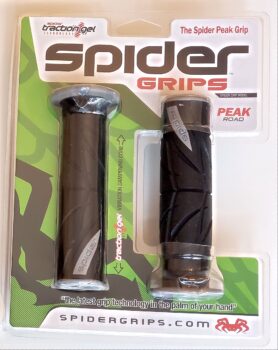
Spider Grips Peak Road Grips (Finally!)
For decades, I’ve used ProGrip 699 Gel Superbike grips on all my street bikes; nothing else has matched their comfort and performance, and I highly recommend them. However, since the goal of this intervention is primarily vibration reduction, and since Spider Grips touts multiple advanced technologies incorporated within their products toward this very aim, I decided to give them a shot. At $17-21 a pair, depending on vendor, it would be an inexpensive experiment on a bike without heated grips. Because aftermarket grips are sold in pairs with two internal diameters – 22mm for the clutch side and 25mm to accommodate the additional girth of the throttle tube – and because grip heaters (OEM or aftermarket) add girth to both sides, it’s necessary to buy two sets to get a pair with enough room to slip on over grip heaters (two throttle-sides). In the case of the Peak Road grips, which have a directional tread pattern, this means the clutch side appears “upside down,” a minor, strictly cosmetic consideration.
Operation Buzzkill, Part 3: Rox Bar Risers
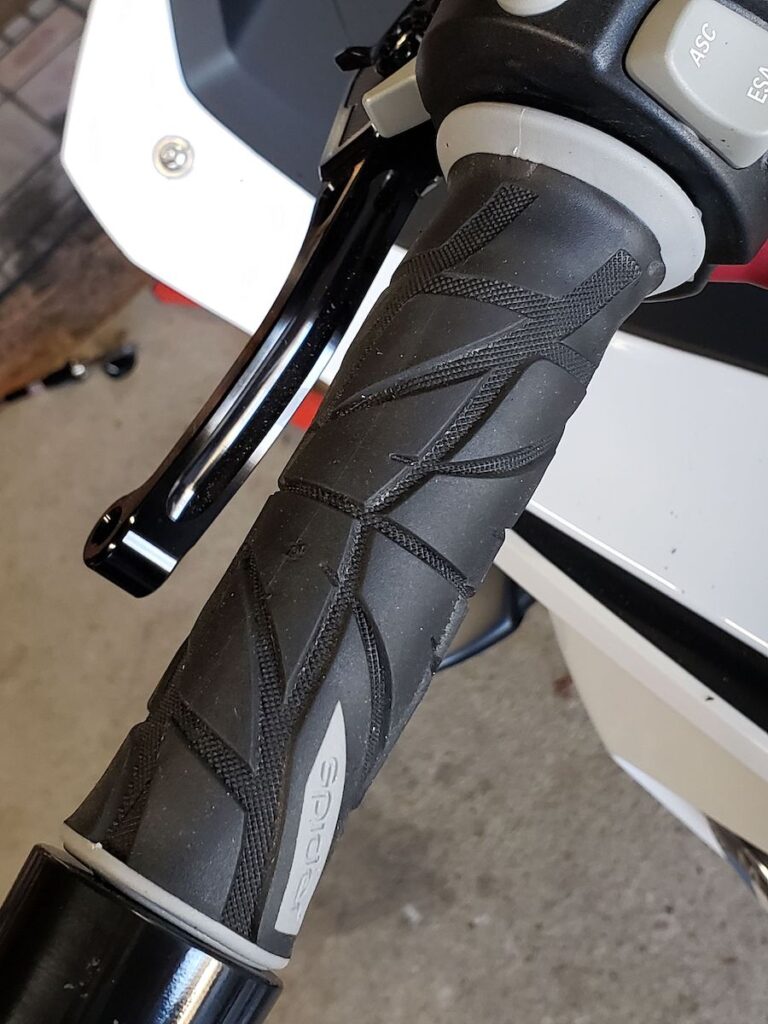
According to Spider Grips, their variable-density elastomers dampen and reflect vibration away from your hands using patent-pending Acoustical Rebound Technology. Not only are there specially shaped, firmer interior boundary layers and isolated, high-traction, soft gel secondary layers, but energy dispersing flanges serve as harmonic dampers to further dissipate vibration. That’s a lot of science packed into something as seemingly straightforward as a rubber tube! The Peak Road grips also feature a water-shedding exterior rubber compound formed with an aggressive tread pattern and a tapered contour, slimmer at the inboard end. They’re available in solid black, or with gray or red accents.
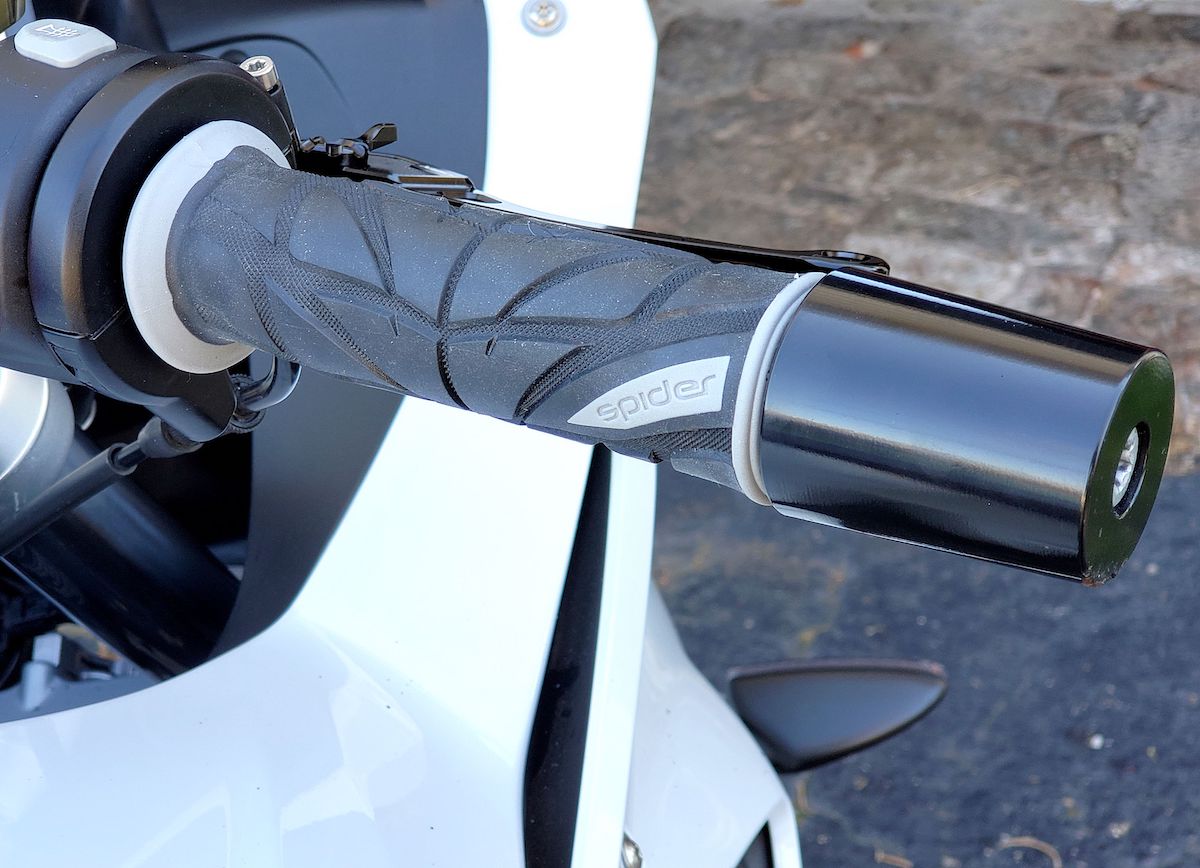
Though substantially thicker than the stockers and slightly beefier than my old favorite ProGrips, the Peak Roads were much less bulky than the Grip Puppies reviewed in the first part of this series and plenty slim enough to feel good in my medium-small hands. They are far, far more comfortable and grippy than the OEMs were, due to their shape, softness, and slightly tacky surface. As for vibration damping, I can’t assess the specific contributions of all those fancy technologies, but I can report these grips noticeably reduced buzzing sensations by about 15-20% within my bike’s mild-to-moderate range of vibration; more severe vibes found their way through the grips virtually unchanged. Still, this admittedly modest – yet significant – improvement came at a low cost (considering the grips’ price alone) and was accompanied by huge gains in comfort and security, compared to the mediocre quality of the stock parts.
If you’re not particular about your grips and your original equipment isn’t worn out, this is probably not a project you’ll find worth the trouble, unless you have non-heated grips and can just swap them out in a few minutes. If, however, you want a much more comfortable bar-hand interface, need to maximize vibration management, have shot OEM grips, and want to save hundreds of dollars, this is an excellent option.